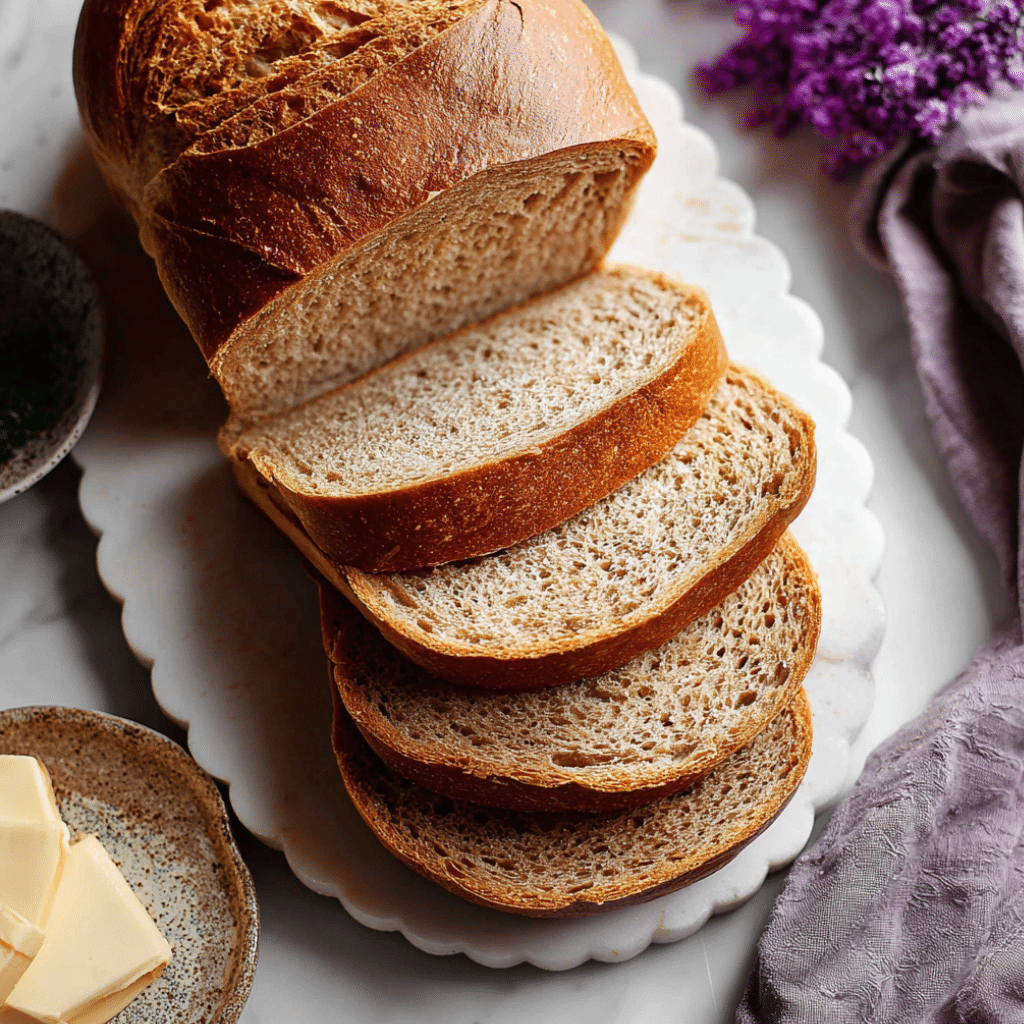
There is something about pulling a golden loaf out of the oven that makes the whole house feel like home. If you have been putting off baking bread because you assumed it would turn out dense and dry, this one is about to change your mind. This whole wheat bread recipe produces a crumb that is genuinely soft and slightly chewy, a crust that turns golden and fragrant, and a warmth from the honey that store-bought loaves simply cannot match. Best of all, the hands-on time is only about 20 minutes. The rest is just waiting, and your oven does the heavy lifting.
Whether you are completely new to baking bread or you have tried a few loaves with mixed results, this recipe walks you through every step with the kind of detail that actually makes a difference. If you enjoy wholesome baked goods, you might also love these morning glory muffins packed with oats and seeds for those busy mornings.
Table of Contents
Why This Whole Wheat Bread Recipe Turns Out Right Every Time
Getting a soft, tender whole grain loaf comes down to a few key techniques, and this recipe uses all of them.
- Proper kneading builds structure. Eight to ten minutes of hand kneading develops enough gluten to trap air bubbles during the rise, giving the loaf its fluffy texture without weighing it down.
- The sponge method gives your yeast a head start. Mixing the flour, water, milk, and yeast together first and letting it rest before adding the remaining ingredients creates a bubbly, active base. This means a better rise and a lighter crumb.
- Honey does more than sweeten. It feeds the yeast, helps the crust brown evenly, and adds just enough moisture to keep each slice soft even on day two.
- Lemon juice makes the flour more workable. A small amount of acid relaxes the gluten strands slightly, which is part of why this loaf stays tender rather than tough.
What Goes Into This Homemade Whole Grain Loaf
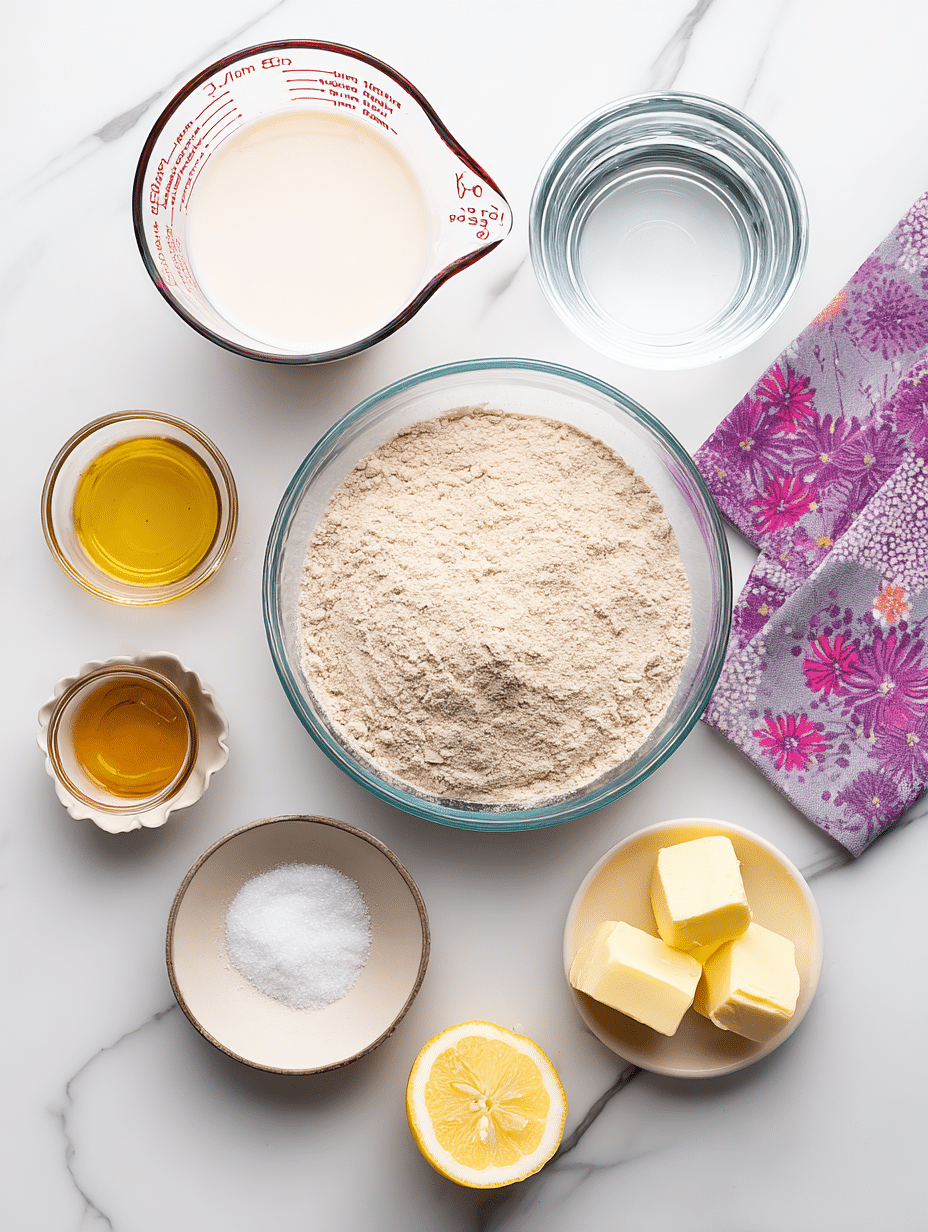
No measurements here since those are in the recipe card, but here is what each ingredient brings to the table.
Whole wheat flour: The foundation of the loaf. Spoon it gently into your measuring cup rather than scooping directly from the bag, which can pack in up to 20% more flour than you need.
Warm water and whole milk: Together they create the right hydration for a soft, slightly rich crumb. Both should feel comfortably warm, not hot, or they will damage the yeast.
Active dry yeast: What gives the bread its rise. Check the expiration date before you start; old yeast is the most common reason a loaf does not rise.
Honey: Adds warmth and a very subtle sweetness. Maple syrup works as a swap and gives a slightly earthier flavor.
Butter: Softened to room temperature so it blends in smoothly. It makes the crumb tender and adds a little richness. For a dairy-free version, use a neutral plant-based spread.
Lemon juice: A small but important addition that keeps the texture from turning heavy. White wine vinegar works just as well if you do not have a lemon on hand.
Sea salt: Brings out all the other flavors and regulates yeast activity during the rise.
Egg white and rolled oats (optional topping): The oats toast beautifully in the oven and give the finished loaf a lovely, rustic look. If you enjoy baking with oats, these oatmeal chia cookies make a great afternoon snack alongside a slice.
How to Make This Honey Whole Grain Loaf Step by Step
Alright friends, this is where we make the most delicious, simple whole wheat bread using basic ingredients! Are you new to baking bread? No worries, you’re covered by this recipe!
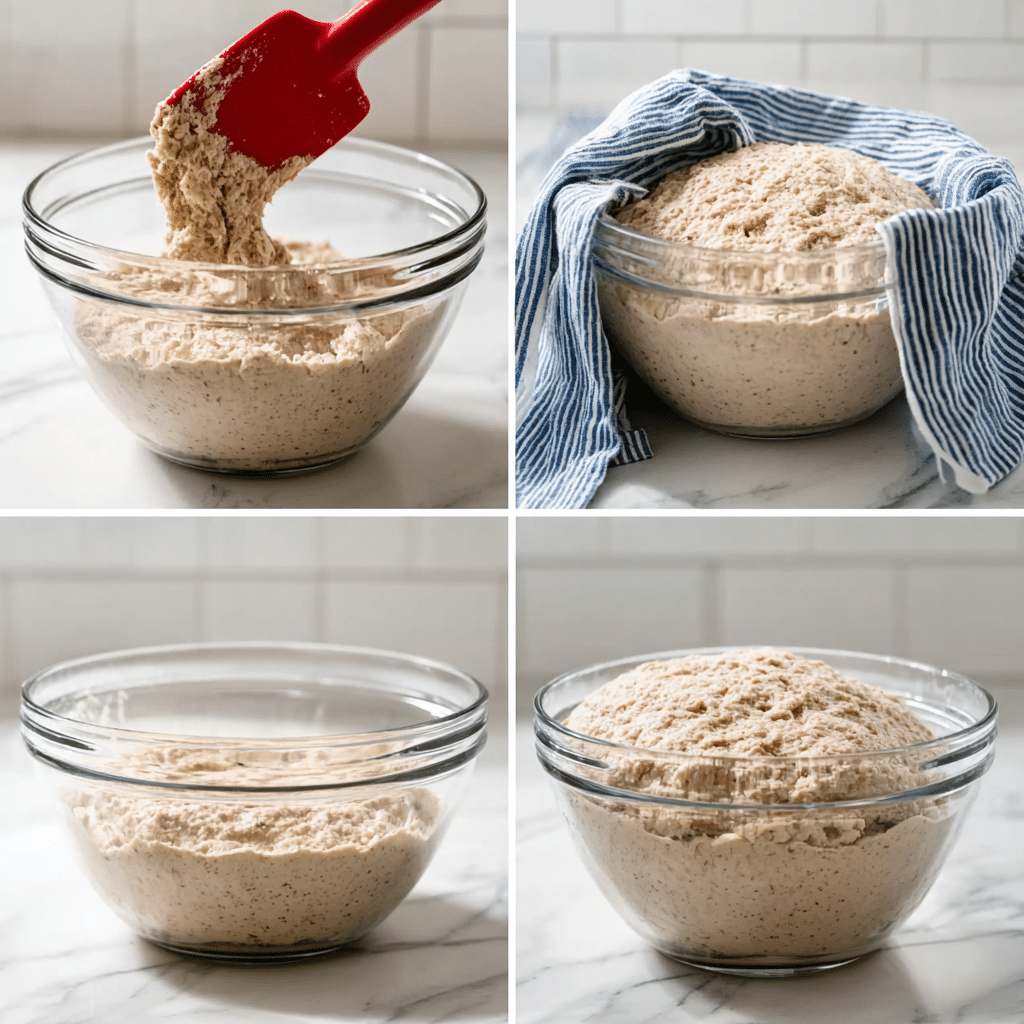
Step 1: Build the sponge starter.
In a large mixing bowl, combine the warm water, warm milk, and yeast. Whisk gently until the yeast dissolves. Stir in the first measure of whole wheat flour until a shaggy mixture forms. Cover the bowl with a clean kitchen towel and leave it in a warm spot for 30 minutes. It should look bubbly and slightly puffed when it is ready.
Pro tip: If your kitchen is cold, set the bowl on top of the refrigerator or inside a cold oven with just the light turned on.
Step 2: Add the remaining ingredients.
Stir the honey, softened butter, and lemon juice into your sponge. Add the salt, then gradually work in the remaining flour about half a cup at a time, until the dough pulls away from the sides of the bowl and feels slightly tacky but not sticky.
Step 3: Knead the dough.
Turn the dough out onto a lightly floured surface. Push it forward with the heel of your hand, fold it back toward you, rotate 90 degrees, and repeat. Keep going for 8 to 10 minutes. The dough is ready when it feels smooth, springs back when you poke it, and holds its shape cleanly.
Pro tip: If the dough keeps sticking, resist the urge to add more flour. Dampen your hands slightly instead. Too much flour is the most common cause of a heavy loaf.
Step 4: First rise.
Place the dough in a lightly oiled bowl, cover it, and let it rise in a warm spot for about one hour until doubled in size.
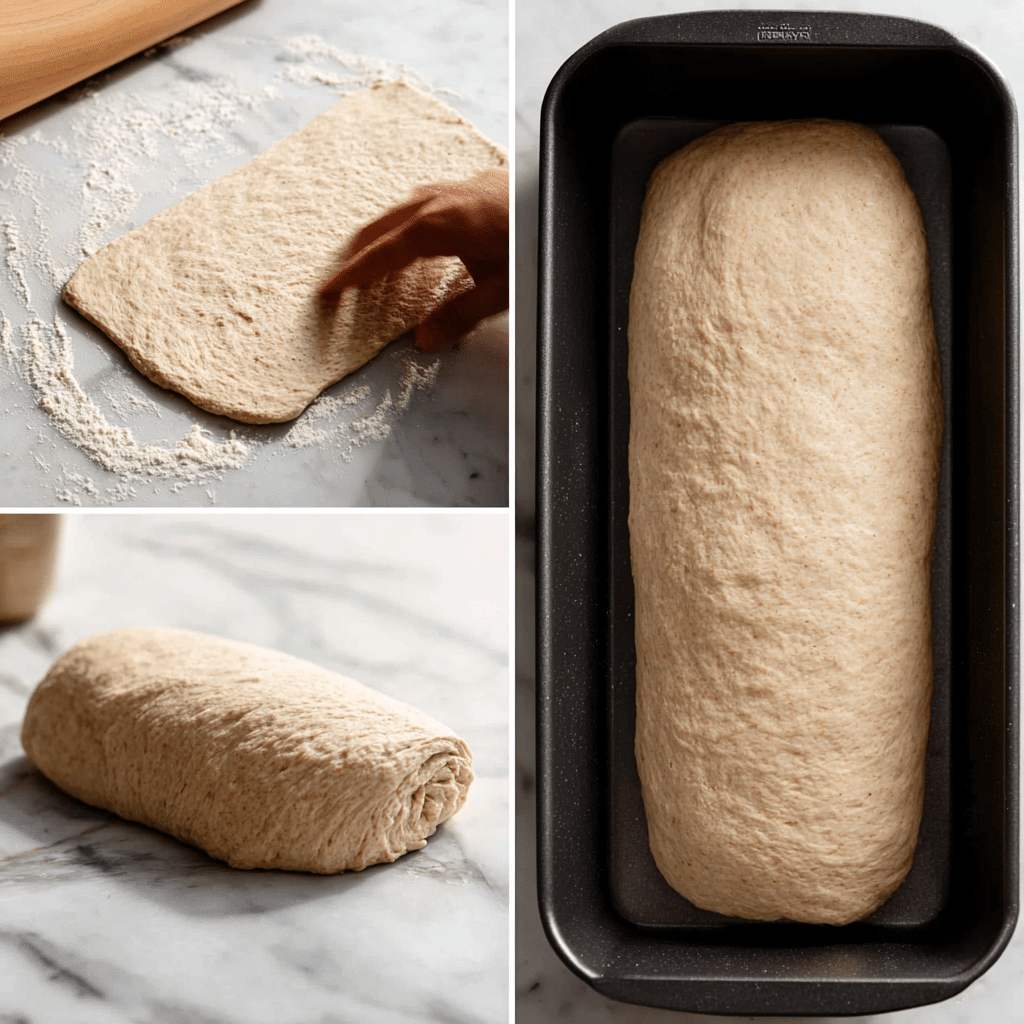
Step 5: Shape the loaf.
Punch the dough down gently to release the air. On a lightly floured surface, flatten it into a rough rectangle, then roll it tightly from the short edge into a log. Pinch the seam closed and place it seam-side down in a greased 9×5-inch loaf pan. For the oat topping, brush the surface lightly with beaten egg white and scatter a small handful of rolled oats on top.
Step 6: Second rise and bake.
Cover the pan loosely and let the dough rise again for about 45 minutes, until it crowns about an inch above the rim. Preheat your oven to 375°F (190°C). Bake for 35 to 40 minutes, until the top is deep golden brown and the loaf sounds hollow when you tap the bottom. Rest in the pan for 10 minutes, then transfer to a wire rack. Wait at least 30 minutes before slicing so the crumb can finish setting.
Pro Tips for Perfect Results
Temperature Tricks That Work:
- Your kitchen temperature totally affects rising time
- Try setting the bowl on top of your refrigerator during the winter.
- Water should feel like a nice warm bath, not hot tub hot!
How to Know When It’s Done:
- A properly baked loaf will produce a hollow sound when you tap its bottom.
- Internal temp should be around 200°F if you have a thermometer
- The crust should be gorgeous golden brown
Quick Troubleshooting Guide
My Bread Didn’t Rise:
- Check your yeast expiration date
- The yeast may have been damaged due to excessively warm water.
- Too cold environment for rising
Dense Bread Solutions:
- You might have added too much flour (measure by spooning!)
- Under-kneaded dough (give it more time next time)
- Not enough rising time
Remember, even “imperfect” homemade bread tastes a million times better than store-bought!

How to Store Your Fresh Loaf and Keep It at Its Best
- Room temperature: Wrap the cooled loaf tightly in plastic wrap or store it in a bread bag. It stays soft for 3 to 4 days.
- Refrigerator: Not recommended. Cold air speeds up staling in bread.
- Freezer: Slice the loaf first, then freeze slices in a zip-lock bag for up to 3 months. Toast individual slices straight from frozen.
- Meal prep: Bake this on Sunday and your weekday breakfasts are sorted. It pairs beautifully with a jar of bircher muesli prepped the night before for a nourishing morning that takes almost no effort.
Once you bake this whole wheat bread recipe at home, going back to the bagged kind is genuinely hard to justify. The flavor, the smell, and the quiet satisfaction of slicing into something you made yourself: it really is one of the most rewarding things you can do in a kitchen. Give it a try this weekend, and if you have questions along the way, leave them in the comments. I love hearing how a first loaf turns out.Partager
Frequently Asked Questions
Can I make this without a stand mixer?
Yes, and this recipe is designed for exactly that. Kneading by hand takes about 8 to 10 minutes and is genuinely satisfying once you settle into the rhythm. If you do own a stand mixer, the dough hook on medium speed for about 6 minutes gets the job done. Both approaches produce a great loaf, so use whatever you have available.
Can I freeze the shaped dough before baking?
Yes. After shaping the loaf and placing it in the pan, cover it tightly with plastic wrap and freeze for up to 6 weeks. When you are ready to bake, transfer the pan to the fridge the night before to thaw, then let it finish its second rise at room temperature for about an hour before baking as normal.
What can I use instead of honey?
Maple syrup, agave nectar, or an equal amount of brown sugar all work well. Liquid sweeteners blend in most smoothly and help the loaf retain moisture, so they are the better choice when you have them. Avoid skipping the sweetener entirely, as it plays a role in browning and yeast activity.
Why did my bread turn out denser than expected?
Whole grain loaves are naturally a bit more substantial than white bread because of the bran content. That said, if yours came out noticeably heavy, the most likely causes are expired yeast, water that was too hot and killed the yeast, or not giving the dough enough time to fully double during either rise. Rushing the rise is the most common beginner mistake.
How long does the whole process take?
The hands-on time is around 20 minutes. With both rise times included, plan for roughly 2.5 to 3 hours from mixing to a fully cooled loaf ready to slice. Most of that time is completely passive, so it is easy to work around other things in your day.

Easy Whole Wheat Bread
Ingredients
For the Starter Mixture:
- 1 cup warm water about baby bath temperature
- 1/3 cup warm whole milk
- 2¼ teaspoons active dry yeast 1 standard packet
- 2 cups whole wheat flour
For Building the Dough:
- 3 tablespoons pure honey
- 3 tablespoons soft butter
- 1 teaspoon fresh lemon juice or white vinegar
- 1⅓ cups additional whole wheat flour plus more as needed
- 1¼ teaspoons sea salt or table salt
Optional Topping:
- 1 egg white beaten
- 1 tablespoon rolled oats
Instructions
- Create the Starter: In a large bowl, whisk together warm water, milk, and yeast. Add 2 cups whole wheat flour and mix until combined. Cover and let rise for 30 minutes until puffy and bubbly.
- Build the Dough: Add honey, butter, and lemon juice to the starter. Gradually mix in the remaining flour and salt until the dough pulls away from the bowl.
- Knead the Dough: Transfer to a floured surface. Knead for 8–10 minutes until smooth and elastic, adding flour as needed if sticky.
- First Rise: Place dough in a greased bowl, cover, and let rise in a warm spot for 1 hour, or until doubled.
- Shape the Loaf: Punch down dough and shape into a rectangle. Roll tightly from the short end to form a log. Seal edges and place seam-side down in a greased 9×5″ loaf pan.
- Final Rise & Topping: Cover and let rise for 45 minutes until the dough crowns above the pan. Preheat oven to 375°F. Brush with egg white and sprinkle with oats, if using.
- Bake: Bake for 35–40 minutes until golden brown. Tap the bottom — it should sound hollow. Let rest in pan 10 minutes, then cool on a wire rack for at least 30 minutes before slicing.