
This summer squash soup recipe starts with something no other version does: roasting the squash first. The oven caramelizes the edges into a deep golden color, and that color is flavor. Total time is 50 minutes, and most of that is hands-off.

If you’ve ever made a blended squash soup that tasted a little flat, this is the version that fixes it. It’s part of the Healthy Soups collection, and it’s one of those recipes you’ll want to keep on repeat all summer long.
Table of Contents
Why You’ll Love This Summer Squash Soup
What I love about this soup is you can make it ahead. It reheats beautifully and honestly gets better the next day as the flavors settle. It also freezes for up to 3 months, which makes it one of the most practical things you can keep in the freezer. Total time is 50 minutes, you need just 9 ingredients, and everything comes together in one pot (plus a baking sheet for the roasting step).
This is a true creamy summer squash soup, and it earns that description without a drop of cream. A Yukon gold potato goes in with the squash and thickens the soup naturally as it simmers. Blend it smooth and you get a silky texture that’s hard to believe doesn’t have any dairy in it.
The Ingredients That Make It Work
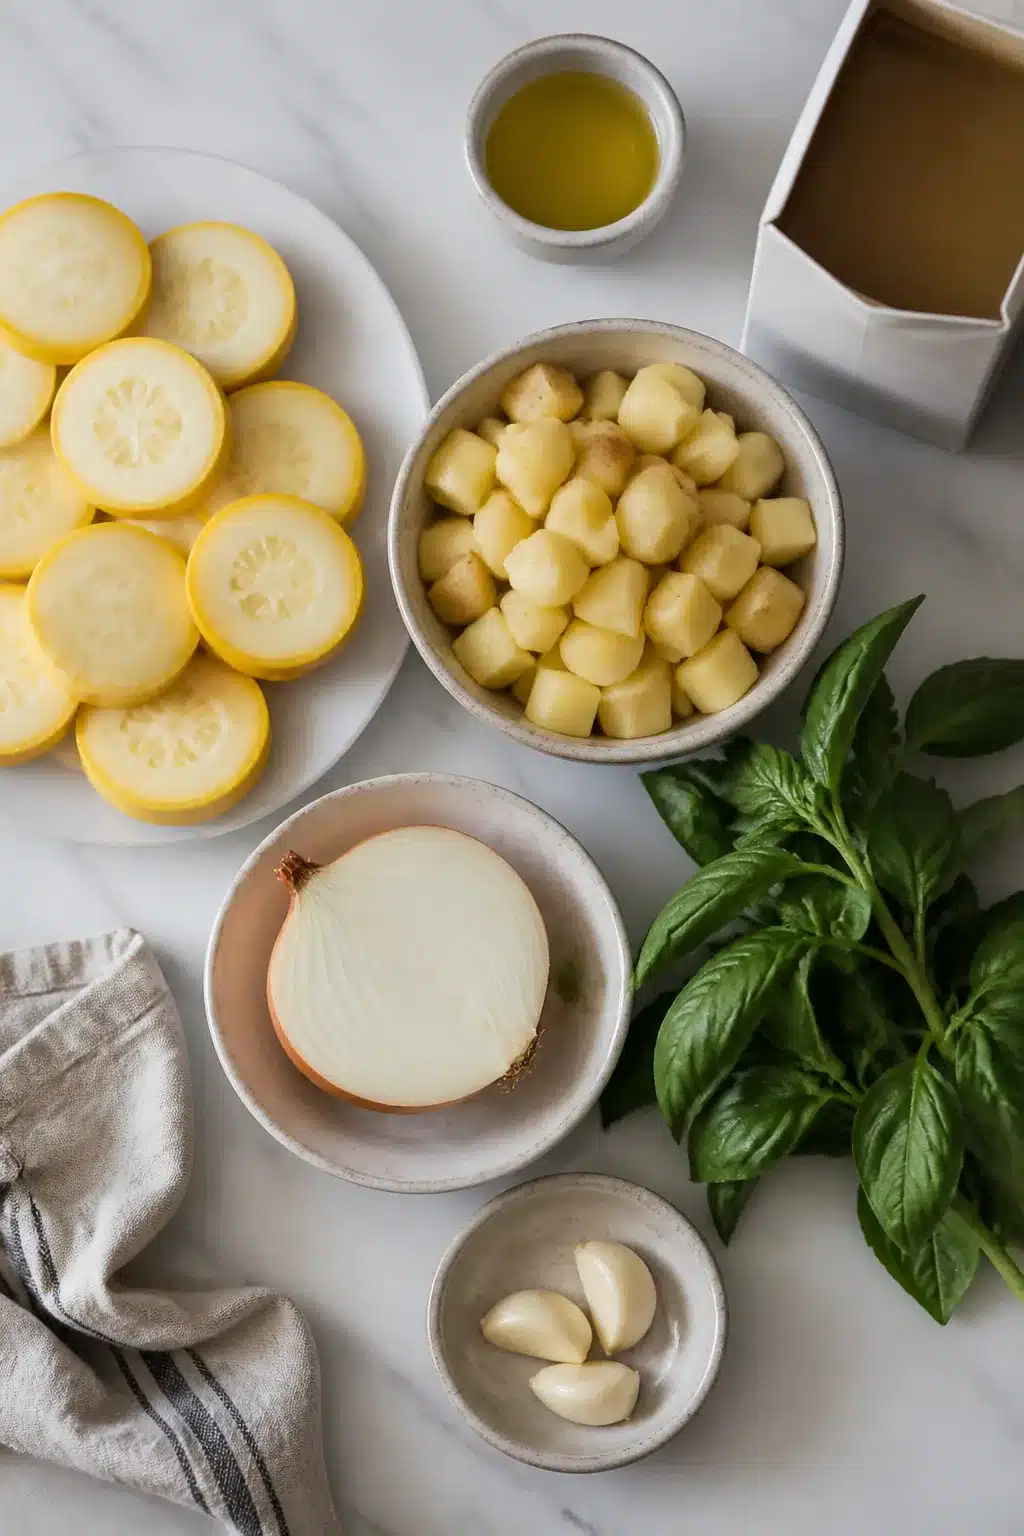
Every ingredient here does a specific job. Here’s what you’re working with and why each one matters.
Yellow summer squash. The star of the soup. Sliced into rounds and roasted until golden, the squash goes sweet and nutty in the oven in a way that plain simmering never achieves.
Yellow onion. Roasted alongside the squash, it softens and sweetens. It adds body to the final blended soup without overpowering the squash.
Garlic. Fresh cloves only. I always recommend using fresh garlic cloves here, not the jar. It just has that extra punch, and in a blended soup where garlic is a main flavor, you’ll notice the difference.
Yukon gold potato. This is the natural thickener. No cream, no cornstarch, no flour needed. The potato cooks right in the broth and blends into the soup seamlessly, giving you that silky, creamy texture. It’s what makes this yellow squash soup feel rich without being heavy.
Low-sodium vegetable broth. The liquid base. Low-sodium gives you full control over the final seasoning.
Olive oil. Used two ways: to coat the vegetables for roasting, and again in the pot for the garlic. Good quality olive oil also works as a finishing drizzle.
Kosher salt and black pepper. Season before roasting and again after blending. Taste as you go.
Fresh basil. Added at the very end, after blending. I always add it this way because basil added during cooking turns bitter. Stirring it in while the soup is hot lets it wilt gently and keeps that fresh, bright flavor. Don’t skip it.
How to Make Summer Squash Soup
To make summer squash soup, roast sliced squash and chopped onion at 400 degrees F for 20 to 25 minutes until the edges are golden and caramelized. Saute garlic, then add the roasted vegetables, diced Yukon gold potato, and vegetable broth. Simmer 15 to 18 minutes, blend smooth, stir in fresh basil, and serve. Ready in 50 minutes.
Here’s the full step-by-step.
Step 1: Preheat and prep. Heat your oven to 400 degrees F. Slice the squash into rounds and roughly chop the onion. Spread both in a single layer on a large rimmed baking sheet. Drizzle with olive oil, season with salt and pepper, and toss everything to coat evenly. Single layer matters here. If the vegetables are crowded, they’ll steam instead of roast.
Step 2: Roast until golden. Slide the baking sheet into the oven and roast for 20 to 25 minutes. You’re looking for the squash edges to turn a real golden brown, not just softened. That golden color is the whole point. It means the natural sugars in the squash have caramelized, and that’s where the deeper flavor comes from. Pull them when they look slightly darker than you’d expect.
Step 3: Saute the garlic. While the vegetables are in the oven, heat olive oil in a large pot over medium heat. Add the minced garlic and saute for 1 to 2 minutes, stirring often. You want it fragrant and just starting to turn golden at the edges. Watch it closely. Garlic goes from golden to burnt fast, and burnt garlic will make the whole pot bitter.
Step 4: Build the soup. Tip the roasted squash and onion into the pot. Add the diced potato and pour in the vegetable broth.

Step 5: Simmer until the potato is tender. Bring everything to a boil over high heat, then reduce to medium-low and simmer uncovered for 15 to 18 minutes. The potato is done when a fork goes in without any resistance at all, completely soft. The soup will look thin when you first add the broth. That’s normal. The potato thickens it as it simmers, and the blending will do the rest.
Step 6: Blend until smooth. Remove the pot from heat. Use an immersion blender to blend directly in the pot until the soup is completely smooth and silky, about 1 to 2 minutes. Work the blender around the sides and bottom of the pot to catch any chunks. If you’re using a standard blender, blend in two batches and leave the lid slightly ajar, covered with a folded kitchen towel, to let steam escape safely.
Step 7: Stir in the basil. Add the fresh basil leaves and stir them into the hot soup. Let them sit for about 1 minute so they wilt in. Taste the soup and adjust salt and pepper until it’s exactly right.
Step 8: Serve. Ladle into bowls. Finish with a drizzle of olive oil, a few fresh basil leaves on top, and a pinch of smoked paprika if you like. Serve hot.

Why Roasting the Squash Changes Everything
Stovetop-simmered summer squash soup can taste flat. The squash goes soft quickly in liquid, but simmering in broth doesn’t add anything to the flavor. It just cooks it through. The soup tastes like squash-flavored water.
Roasting does something completely different. At 400 degrees F, the outside edges of the squash dry out and caramelize. You get actual golden color on the cut surfaces. That color is flavor. The sugars concentrate, the squash turns slightly sweet and nutty, and when you blend it into the soup, all of that depth goes into every bowl.
I tested this both ways, simmered on the stovetop and roasted first, and the roasted version is the one my family asked for again the next week. The difference is real and it’s significant.
The extra step is just 20 minutes in the oven, mostly hands-off. You saute the garlic, prep the potato, and by the time that’s done the squash is ready to come out. Fire up the oven. It’s worth it.
Easy Ways to Change It Up
The base recipe is simple enough that it takes to variations really well. Here are four worth trying.
Add coconut milk for a richer texture. After blending, stir in half a cup of full-fat coconut milk. It makes the soup noticeably creamier and adds a subtle sweetness that works well with the squash. This is the version to make if you want something a little more substantial.
Stir in white beans for protein. A can of drained white beans added after blending (or before, if you want them fully blended in) adds about 7 grams of protein per serving and makes the soup more filling. The same idea works in my Vegan Pea Soup if you want another recipe to try it in.
Instant Pot version. Skip the roasting step (or do a quick 10-minute roast just for color) and pressure cook everything together on high for 8 minutes. Quick release, then blend. It’s faster, though you’ll get a slightly cleaner flavor without the caramelized depth.
Spice it up with cumin and smoked paprika. Swap the basil for a little cumin and smoked paprika, stirred in after blending. It gives the soup a warm, earthy spin that’s completely different from the fresh herb version. Both are great.
How to Store and Reheat
This soup keeps really well, which is part of what makes it such a good make-ahead option.
In the fridge: Store in an airtight container for up to 4 days. It thickens a bit as it sits, which is fine. Just add a splash of broth when reheating to loosen it back up.
In the freezer: This soup freezes beautifully for up to 3 months. One important tip: freeze it without the basil. Basil doesn’t hold up in the freezer. Stir in fresh basil after reheating instead.
Reheating: Warm it on the stovetop over medium-low heat, stirring occasionally. Add a small splash of vegetable broth if it’s thicker than you’d like. Don’t boil it. Just bring it to a gentle simmer and it’s ready.
You will hope to have leftovers. The next day, the flavors have had time to settle and the soup is somehow even better.
Frequently Asked Questions
Can you freeze summer squash soup?
Yes. Summer squash soup freezes well for up to 3 months in an airtight freezer-safe container. Freeze it without the fresh basil, which doesn’t hold up well after freezing and thawing. Stir in a handful of fresh basil after reheating to bring back the brightness.
How do you thicken summer squash soup?
The Yukon gold potato in this recipe does the thickening naturally. No cream or starch needed. If you want an even thicker soup, add a second small potato or reduce the amount of broth slightly. Blending for a full 1 to 2 minutes also helps achieve a thicker, creamier texture.
Can you eat summer squash soup cold?
Yes, this soup works cold. The flavor is a little more subtle when chilled, and the texture is slightly thicker. It’s similar to a chilled gazpacho-style soup. If you’re serving it cold, adjust the seasoning before serving because cold temperatures can mute salt and pepper.
What squash is best for summer squash soup?
Yellow summer squash is ideal because of its mild, sweet flavor and how smoothly it blends. Zucchini works too and produces a slightly greener-colored soup with a more neutral taste. Patty pan squash also blends well. The key is to use squash that’s tender, not large and seedy.
How long does summer squash soup keep in the fridge?
Stored in an airtight container, this soup keeps in the fridge for up to 4 days. It thickens as it sits. Add a small splash of vegetable broth when reheating to bring it back to the right consistency. The flavor actually improves after a day as everything melds together.
More Soup Recipes to Try
- Vegan Mushroom Soup
- Vegan Tomato Soup Recipe
- Vegetable Barley Soup Recipe
- Low-Calorie Cabbage Soup Recipe
If you made this, pin it for later and leave a comment below. I love hearing how it turned out.

Creamy Summer Squash Soup
Equipment
- Rimmed baking sheet
- 4-qt or larger Large pot
- Immersion blender or standard blender
Ingredients
- 2 lbs yellow summer squash about 4 medium, sliced into 1/2-inch rounds
- 1 medium yellow onion roughly chopped
- 3 tablespoons olive oil divided
- 4 garlic cloves minced
- 1 medium Yukon gold potato about 8 oz, peeled and diced
- 4 cups low-sodium vegetable broth
- 1 teaspoon kosher salt plus more to taste
- 1/2 teaspoon black pepper
- 1/4 cup fresh basil leaves plus more for garnish
- 1/2 teaspoon cumin optional, for topping
- 1/4 teaspoon smoked paprika optional, for topping
Instructions
- Preheat your oven to 400 degrees F. Spread the squash slices and chopped onion in a single layer on a large rimmed baking sheet. Drizzle with 2 tablespoons of the olive oil, season with salt and pepper, and toss to coat evenly. Single layer is important: crowded vegetables steam instead of roast.
- Roast for 20 to 25 minutes, until the squash is tender and the edges are golden and caramelized. You want real color on the cut surfaces. Golden edges mean the natural sugars have concentrated, and that depth goes directly into the finished soup.
- Heat the remaining 1 tablespoon of olive oil in a large pot over medium heat. Add the minced garlic and saute for 1 to 2 minutes, stirring often, until fragrant and just beginning to turn golden at the edges. Watch it closely: garlic goes from golden to burnt fast.
- Tip the roasted squash and onion into the pot. Add the diced potato and pour in the vegetable broth.
- Bring to a boil over high heat, then reduce heat to medium-low and simmer uncovered for about 20 minutes, until the potato is completely tender when pierced with a fork. The soup will look thin at first. That is normal: the potato thickens it as it cooks.
- Remove from heat. Use an immersion blender to blend directly in the pot until completely smooth and creamy, about 1 to 2 minutes. If using a standard blender, blend in two batches and leave the lid slightly ajar, covered with a folded kitchen towel, to let steam escape safely.
- Stir in the fresh basil leaves and let them wilt into the hot soup for 1 minute. Taste and adjust seasoning with salt and pepper until it is exactly right.
- Ladle into bowls. Finish with a drizzle of olive oil, a few fresh basil leaves, and a pinch of smoked paprika if you like. Serve hot.